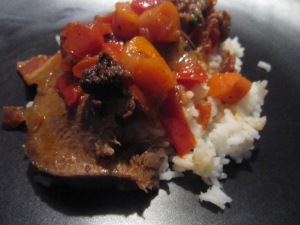
Portuguese style Pig’s Feet

Pig's feet stewla dee la dee la…. I know what some of you are already saying…. gross… But again, try it, you MAY like it. And hate to say it but to all my friends who actually ate at my house, you’ve had it! My trick? Cutting the meats so small you had no idea what part of the piggy you were eating. And you liked it! See?

Now next question is where the heck can I find pig’s feet (as so many of you are eager to try this recipe!). Well, I have lived now in 5 states and have been lucky to find pig’s feet in every state. Often you can find it at your local supermarket, if not try Asian or Hispanic ones.

Believe it or not my daughters LOVE this recipe. My oldest, the Dancer will leave the beans to the side, but will NOT miss a piece of meat though. She will clean the little bones better than any dog would (well the dog would actually eat the bone, right?). The Princess is finally getting the hang of cleaning all those small bones and she devours it all. Next day if there are any leftovers she takes them to daycare (hmmm… I wonder if anyone there ever noticed it was pig’s feet she was eating!)

INGREDIENTS

3 lbs fresh or frozen pig’s feet – not the smoked or jarred type please!
1 lb of bacon cut into pieces
1 tbsp of olive oil
2 diced onions
4 cloves of garlic chopped
2 bay leaves
3 cans of beans (I prefer black or red beans, but you can use whatever ones you want)
1 to 2 liters beef stock
salt & pepper to taste

DIRECTIONS

  1. If you are using dry beans, soak them overnight.
  2. Clean well the pigs feet, I usually rinse them through vinegar and leave them for a few hours with water and salt.
  3. In a large pot add the olive oil and lightly sauté the onions, garlic and bacon.
  4. Add the feet and brown them lightly from all sides.
  5. Add some of the stock and all other ingredients. Stock should cover everything, but if need be add a bit more from time to time.
  6. Cover and let it all simmer for at least 2 hours.
  7. Serve with some white rice and do not forget a nice bottle of red wine or beer!

Portuguese Meat Croquettes

Portuguese meat croquetsSo you’ve just finished dinner and have some steak leftover, or that huge amount of turkey after the holidays, well… you get the idea. Re-use it! Freeze the leftover meats until you have enough. And make sure to keep all of its juices, gravy or whatever else that was with the meat.

Once you have enough different types of leftover meats, you can finally put them to good use by making these croquettes. As you will see the measurements were from the meats I had in the freezer. The main idea to to create a similar ratio of beef/poultry/pork.

And a big thank you to my Dancer who decorated the plates so beautifully!

INGREDIENTS

3 cups of ground presunto / prosciutto or some type of salt cured meat
4 cups beef leftovers
5 cups of smoked turkey leftovers
4 cups of chicken leftovers
6 cups of pork leftovers
2 large onions
8 cloves garlic
For the Béchamel
2 bars of salted butter
4 cups of all-purpose gluten-free flour
10 cups of milk
For frying
3 to 5 eggs
fine gluten-free breadcrumbs
oil to fry

DIRECTIONS

  1. Thaw all of the meats them grind them.
  2. Make the Béchamel sauce by first melting the butter in a large pot, then adding the flour and mixing well until attaining a smooth paste. Add the milk a cup at the time so to blend it all nicely, and stir constantly until you create a nice smooth cream.
  3. Add the meats and adjust with seasonings to taste.
  4. Let it simmer for about 10 minutes.
  5. Remove it from heat, let it cool then place it in the fridge overnight.
  6. Next day in the first bowl beat the eggs, in the second add the breadcrumbs.
  7. Create “tubes” with the meat paste, then pass them through eggs then the breadcrumbs and place them neatly in a tray to freeze them for an hour or so.
  8. Once frozen, you can immediately fry them, or put them in freezer bags to be fried at a later date.

Mac & Cheese #1

Mac & cheeseBack home in Europe we do not eat mac & cheese. I was first introduced to it from the box and I must say it was never up there in my list of yummy food. It tasted plasticky and not much flavor. Since, and thanks to becoming a recipe tester for Leite’s Culinaria, I was introduced to what REAL mac & cheese is about. I still had a few boxes at home, mostly for the kids, but from the moment I tried what Mac & Cheese is to taste like, I filled a bag with those boxes along with other canned and boxed items and brought it to the local food pantry (I know… if I would not eat it why bring it to the food pantry? well unfortunately they cannot accept home made goods, if not, trust me… I would be there EVERYDAY sharing our cookings with them!)

So here is one of the recipes I tried and since have made it many times. This is an awesome and easy recipe to make for a weeknight. Everyone absolutely loved it and the best part is that you can use this as a base then add whatever pleases your heart.

But no worries, this is not the only one. Hence the reason I call it #1 as there will be more!

Oxtail machaca with poached egg

Oxtail Machaca

Final plate

The other day I bought some oxtail as it was on sale. Is it just me, or has oxtail tripled its price in recent years?

Usually I make oxtails with lentils or beans. but was not quite in the mood for a cold night’s dinner. So thanks to a Facebook group I belong to, I decided to make something I had never made before.  As I had never made Machaca, I started to google and read all types of recipes so to inspire me. As usual, I had to give my own twist to the traditional recipe.

I started by seasoning the oxtails with salt and cracked pepper. then I browned the oxtails in hot olive oil. Once all sides were nice and golden, I added water to cover them up, and let it simmer for about 3 to 4 hours until the meat came out of the bones very easily. Then I removed the oxtail out of the pot, preserving its broth (not quite sure yet what I will use this for, one thing is for sure, it won’t go to waste).

cooked oxtail

Princess stealing cooked oxtail

As it was cooling off I wondered if I would have enough meat as my toddler kept on “stealing” some every 5 seconds. Thankfully I was able to convince her instead to try to remove all the leftover meat from the bones and clean them well. But here are of the the ingredients and exact directions I followed. Again this is not the traditional Machaca.

INGREDIENTS

About 20 to 25 pieces of oxtail
3 tbsp of olive oil
water
1 finely chopped medium size yellow onion
1 diced green pepper
3 diced tomatos
1 jalapeño pepper finely cut
6 eggs
1 bunch of cilantro
2 cups of the oxtail broth
shredded cheese
salt & pepper

DIRECTIONS

  1. Place all of the oxtail inside a large bowl and season it well with salt and freshly cracked pepper.
  2. Bring a large pot, or dutch oven to high heat with 1tbsp of olive oil.
  3. Sautée all sides of the oxtail until nice and brown.
  4. Fill the pot with water so that it fully covers all of the oxtail and bring the heat to a low simmer and leave it for about 3 to 4 hours (if you need to step away for a while or if you started preparing it prior to leaving to work, an idea is to place oxtail and water into a crockpot in low, for the day and your meat will be ready when you get home).
  5. Once the meat is falling off the bones, remove it from the broth to cool down prior to shredding it.
  6. In a large skillet, warm up the rest of the olive oil and sautée the onions, green peppers and jalapeño (you can omit the jalapeños and create a side sauce with it by simmering a cup of the oxtail broth with the cut up jalapeño, then each person can add however much spicy heat to their own plates).
  7. Once golden in color, add the shredded oxtail meat followed by the diced tomatos and half the cilantro leaves.
  8. Bring heat to a simmer and add 2 cups of the oxtail broth, then crack the eggs so to poach them over the meat mixture. Cover the skillet. Check if eggs are cooked after 3 minutes.
  9. Serve over some white rice (or in tortillas) making sure each plate has one egg and decorate it with the remainder cilantro and shredded cheese.

IMG_20120906_153113_edit0 IMG_20120906_180516 IMG_20120906_183350

Cauliflower au Gratin

Cauliflower au gratinA very simple and cheap recipe that fills lots of stomachs. This is a recipe I grew up with and absolutely love making it as soon as the weather gets colder. Kids love it as it is cheesy and has lots of ham. You can easily substitute the cauliflower for brocoli if your kids prefer that. Or even better add both of them.

INGREDIENTS for the béchamel

1 stick of salt butter
2 cups of all-purpose gluten-free flour
6 cups of milk
salt and pepper to taste

INGREDIENTS for the gratin

Béchamel
3 cups of shredded cheese
5 cups of diced ham
1 cauliflower cut into small pieces

Extra cheese to use over the the top

DIRECTIONS

  1. In a large pot add water with a bit of salt and cook the cauliflower for about 15 to 20 minutes.
  2. In a medium size pot melt the butter then add the flour and consistently mix to create a nice doughy well blended paste.
  3. Slowly add the milk and keep on incorporating it until forming a creamy sauce.
  4. Preheat the oven to 375.
  5. Strain the cauliflower and add it to the béchamel along with the ham and cheese and mix it all together.
  6. Pour the whole thing into an oven-safe deep dish and place it in the oven for 25 minutes.
  7. Change the oven temperature from 375 to high boil (or about 475) for about 5 minutes then remove from the oven, let it rest 5 minutes and serve.

Stewed Cow Tongue

Cow TongueHere we go…. please, at least read it to the end. It really ins’t bad and if you forget it is actually a tongue you are eating, you may like it!

Am I kidding? Actually… no I am not. BUT what is important is to know where this tongue comes from. This is the second year that we get 1/8 to 1/4 of a cow from a local farm, so I feel comfortable with other less typical parts such as a cow tongue. What is the end result taste of cow tongue? Depending on how you cook it, as long as it boils for a while, it is a very tender meat that easily grabs the sauce it cooks in. Actually this would be perfect to use as pulled beef, but in this recipe I am creating it with a tomato based sauce.

INGREDIENTS

1 cow tongue
water
salt

FOR THE STEW
2 tbsp of olive oil
1 chopped onion
3 chopped garlic cloves
10 diced tomatoes
1 bay leaf
1 bunch of parsley
1 diced carrot
2 cups of beef stock
cooked cow tongue sliced

DIRECTIONS

  1. Wash the cow tongue with cold water.
  2. In a pressure cooker add the tongue and cover it with water and add salt.
  3. Close the pressure cooker tightly and let it cook for at least 30 minutes.
  4. Remove from heat and wait until the …. stops prior to removing it.
  5. Let it cool then remove the tongue and clean it all until you see nothing but the meat.
  6. Meanwhile heat the oil in a large pan, add the onions and garlic until golden.
  7. Add the rest of the ingredients and let it simmer for a good 40 minutes.
  8. Add the sliced tongue, cover it a let it simmer for 20 more minutes.
  9. Serve immediately with some rice, pasta or mashed potatoes.